Dental Impression Materials
Share
Accurate dental impressions are the foundation of many successful treatments, from crowns and bridges to dentures and orthodontic appliances. Choosing the right impression material and technique ensures a precise fit and a comfortable experience for the patient. In the UK, dentists often rely on a combination of traditional materials (like fast-setting alginate for study models) and modern elastomers (such as high-precision silicones and polyethers) to meet different clinical needs. Understanding the differences between materials and the best practices for each can help improve your workflow and patient outcomes.
Types of Impression Materials
Dental impression materials fall into two main categories: irreversible hydrocolloids (alginate) and elastomeric materials (silicones, polyethers, etc.).
Alginate is a cost-effective choice for preliminary and study impressions because it’s easy to mix and quick to set. Many clinics use fast-set alginate to take general impressions or create mouthguards. However, alginate impressions can distort if not poured immediately, so they are not recommended for final restorations.
Elastomeric materials are the go-to for final impressions. This category includes addition silicones (polyvinyl siloxane, or PVS), condensation silicones, and polyether. These materials are very accurate and dimensionally stable. For example, addition silicones (like 3M Imprint or Aquasil) come in different viscosities – from thick putty to thin light-body – for a two-step putty-and-wash technique. Polyether materials (such as 3M Impregum Penta) set up very rigidly, capturing detail well even under moist conditions. Both types resist tearing and maintain stability, giving you a highly precise impression that remains accurate until poured.
Choosing the Right Material for the Procedure
When selecting an impression material, consider the clinical situation. For a single crown or small bridge, dentists often use a dual-viscosity approach: a heavy-body or putty silicone in a tray plus a light-body wash around the prepared teeth. This combination captures the fine margins while providing support. Both parts usually come from the same system to ensure compatibility.
For dentures or full-arch cases, a more rigid material is key. Medium- or high-viscosity silicones or polyethers in a custom tray work well because they don’t flex as easily. Moisture (saliva or blood) can compromise some materials, so control the field with cotton rolls and suction. In UK practices, popular materials include addition silicones like 3M Imprint and polyethers like 3M Impregum. What’s most important is following the manufacturer’s instructions precisely: correct mixing ratio and timing to ensure the material sets properly.
Mixing and Dispensing Impression Materials
Proper mixing is critical. Many practices now use automix cartridges and static mixing tips to ensure consistency. These cartridges hold separate base and catalyst pastes and snap into a mixing gun. As you extrude, the pastes blend through a specialized nozzle. For example, 3M’s PentaMix system uses red Penta mixing tips that fit the cartridge; these tips help reduce the force needed to dispense thick silicone.
If mixing by hand (common for alginate or similar materials), follow the recommended powder-to-liquid ratio exactly. Use a clean rubber bowl and a flat spatula. Mix briskly but smoothly to avoid trapping air bubbles. Once mixed, immediately load your impression tray or syringe and use it within the working time. With automix systems, always attach a new mixing tip for each use so you get a fresh, fully blended mix every time.
Using Impression Trays and Syringes
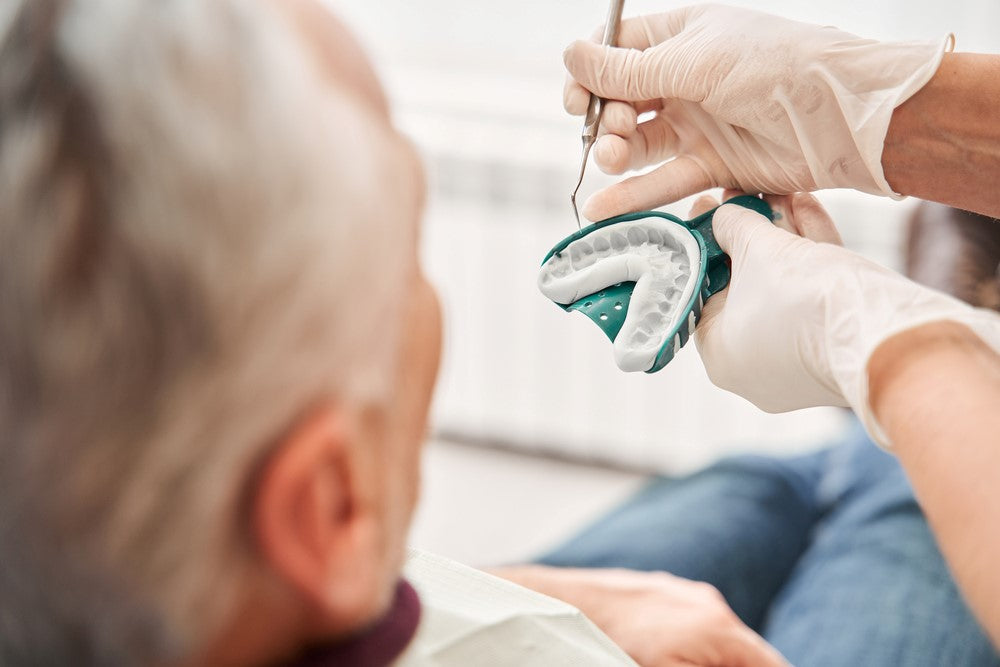
Choosing the right tray helps with accuracy. Stock trays (metal or plastic) should be rigid and large enough to cover the arch with room for material and tissues. Custom trays (made from acrylic or resin) give the best fit for full-arch or complex cases, reducing material waste and improving accuracy. Always apply tray adhesive to the inner surface of the tray and let it dry before loading the material.
For detailed impressions, dentists often use an impression syringe or automix gun. This tool lets you place light-body material exactly around tooth margins and into sulci. When using a syringe, attach the mixing nozzle just before dispensing so the material is already mixing as it comes out. Inject the material in a smooth, continuous stream, starting near the gingival margin of the farthest tooth and moving to the occlusal surface. Once the wash material is in place, immediately seat the loaded tray containing heavy-body or putty material. Hold it steady with even pressure until set, and avoid any movement during setting.
Tips for a Better Impression
Keep the area clean and dry with suction and cotton rolls to avoid contamination. When seating the tray, do it gently and tilt it into place rather than dropping it quickly. For large or full-arch impressions, use a strong tray and consider a handle or bite block to stabilize it. After the impression is removed, inspect it immediately for voids or tears. Rinse the finished impression under cold water to remove debris, then spray or soak it in an approved disinfectant for about 10 minutes. Rinse again briefly before sending the impression to the lab or pouring the model. Finally, label the impression with patient details and the material used to avoid mix-ups.
By choosing the right impression materials and using best practices—like automix systems with mixing tips and proper tray adhesives—you can achieve accurate, detailed dental impressions every time. Proper technique not only improves restoration fit but also enhances patient comfort. With these tips, dental professionals can confidently select and handle materials such as polyether (Impregum) and addition silicones for consistent, high-quality impressions.